PRODUCT FOCUS: INTERFEROMETERS: What to look for in interferometer systems
A crucial part of optical design and manufacturing is the ability to test and quantify the optical specifications of your product. Interferometers are a long-established tool for test and measurement of nanometer-level optical characteristics, but weighing all the options and specifications for the numerous types of instruments can be tricky. We talked to some experts to bring you the latest advances in interferometers, and what to look for.
Optical interferometers are instruments that use interference of light to precisely measure parameters such as surface roughness, topography, or displacement. They typically consist of a light source (a laser, laser diode, or white-light source), a beamsplitter to create the independent measurement, and reference beams, reference optics, imaging optics, and a detector.
There are generally two types of measurement: displacement and shape. Displacement interferometers provide precise measurement of linear and angular displacements and are used primarily in OEM semiconductor IC manufacturing for precise layer alignment. Shape interferometry breaks into two categories: laser interferometers and optical profilers. The laser interferometer quantifies the low-spatial-frequency form of a surface and is most commonly Fizeau-based, which lends the advantage of a common path design. Twyman Green configurations are also useful in select surface-form applications. Surface-form metrology concerns surface measurements on the scale of millimeters and inches or even meters to measure the shape of a surface, not the roughness, says Andrew Kulawiec, metrology product-line manager at QED Technologies (Rochester, NY). This technology is good for measuring spherical or flat lens surfaces.
The optical profiler uses interferometric microscope objectives to measure high-spatial-frequency characteristics such as surface microroughness. This surface-measurement technology is where the action is, says Don Pearson, director, sales and marketing at Engineering Synthesis Design (ESDI; Tucson, AZ).
On the surface
One advance in optical profilers is the advent of white-light interferometers (WLIs), which use either Mireau or Michelson interferometric configurations to define the light path and quantify the errors on a surface, like pits and defects, says Dan Musinski, senior product manager at Zygo Corporation (Middlefield, CT). These are useful for measuring everything from razor blades to automotive engine parts and replacement hip joints.
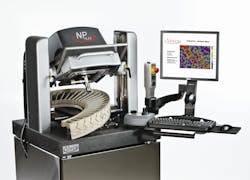
"Traditionally, WLIs have catered to measuring small samples, with the realm of large samples being addressed by contact-based 2-D coordinate measurement machines (CMMs)," says Andrew Masters, vice president, strategic marketing and business development at Veeco. But white-light tools have made progress in measuring ever-larger samples, delivering three dimensional (3-D) measurements with increased data density and less ambiguous measurements (see Fig. 1).
Some of the most significant advances in surface measurement have been with respect to aspheres. An asphere-measuring device typically consists of a sensor, such as an interferometer or stylus probe; a platform to mount and position the part relative to the sensor, and software to direct the motion of the part/sensor, acquire the data, and process the results.
When polishing optics, according to Musinski, a quick qualitative view of a fringe pattern can verify that the surface form is headed in the desired direction. A trained eye viewing an interferogram can detect surface imperfections on the order of λ/10 (λ = 633 nm). As the part approaches its final shape, it is important to have a reproducible and quantifiable method of analyzing surface defects, and often defects smaller than the eye can resolve must be detected.
Several technologies have evolved to meet the need for quantifying an aspheric surface. The new aspheric stitching interferometer (ASI) from QED measures glass, infrared diamond-turned, or molded aspheres via subaperture stitching interferometry to first evaluate smaller subsections, or subapertures, of the surfaces and then stitch them together into a cohesive full-aperture picture (see www.laserfocusworld.com/articles/343747).
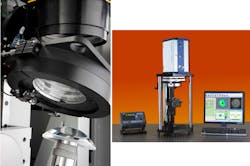
Kulawiec explains that because the ASI considers only a smaller portion of the lens at a time, the fringes from mild aspheric departures can be resolved. However, with more severe aspheric departures, the fringe density of each subaperture is still too great. The ASI's Variable Optical Null device solves this problem; it is an advanced optomechanical subsystem that automatically selects and measures each subaperture in 15 to 30 seconds (see Fig. 2, left). A complex surface that requires 20 subapertures can be measured in less than 10 minutes. Once the subapertures are measured, advanced stitching algorithms reconstruct the surface profile of the asphere. The ASI enables measurement of aspheres exceeding 200 mm in diameter and 1000 waves (650 µm) of departure from best-fit sphere.Another recent solution in asphere interferometry is the Intellium Asphere from ESDI, which incorporates traditional phase-shifting measurement techniques and a custom camera to capture and process the high-density interferograms generated from aspheric surfaces (see Fig. 2, right). In addition to aspheres, the Fizeau-based interferometer also provides noncontact characterization of spherical and flat surfaces, says Pearson, making it ideal for production and process-control applications. The Intellium Asphere incorporates an interferometric analysis technique called Sub-Nyquist Interferometry (SNI), which can capture and analyze four fringes per camera pixel to overcome the resolution limitations of traditional phase-shifting interferometry.
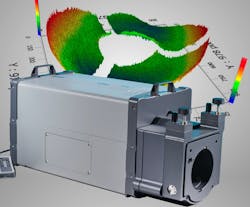
Other interesting recent advances in interferometry include measurement in unstable environments, says Musinski. In traditional mechanical phase-shifting systems, the reference surface translates a small distance of the reference surface along the optical axis. For metrology in the presence of extreme vibrations, Zygo plans to introduce a new interferometer this month at Photonics West that enables dynamic acquisition of flats and spheres for applications prone to large vibrations, such as testing an optic located in a vacuum chamber. The interferometer combines unique hardware capabilities with Zygo's new DynaPhase acquisition with its MetroPro X software (see Fig. 3).Key specs
A multitude of specifications must be considered to fit the proper interferometer to the customer. "First," says Pearson, "we need to define the type of surfaces being measured: concave, convex, aspheric, corner cubes?" Most commercially available interferometers are limited in terms of radius and diameter to the coverage of the transmission spheres that are available, adds Kulawiec. "Standard interferometer transmission spheres come in 4 and 6 in. apertures, with f-numbers down to about 0.75. This can be particularly limiting for optics with larger clear apertures (diameters), numerical apertures (such as a hemisphere), or both."
"You also need to know the size of the surfaces to be measured, and the reflectivity of the surfaces," continues Pearson. "You need to understand the environment in which the measurements will be made. And last of all, you need to understand the accuracy required."
The surface shape determines the range of diameters of optics. "For concave optics, there's really no limit to the range of diameters that can be measured," explains Pearson. For convex optics and flats, typical diameters we can measure range from to 0.5 mm to 32 in., depending on the output beam. "You may need beam expanders that take a 4 in. beam to 16 in.," says Pearson. "Convex optics create challenges that require special attention to correctly match the reference optics to the surface being measured."
The accuracy at which you want to measure their optical surface might range from λ/10 on the low end up to λ/100 on the high end. "The actual measurement uncertainty is important to understand," says Musinski. "Many factors go into that," so ask your vendor to be specific. For example, in the case of deterministic polishing, it is important to understand the power spectral density of your reference surface. In addition, the ability to accurately quantify the actual form of the reference surface is a recently introduced capability that enables measurement uncertainties below 10 nm.1
Next you will need the right accessories, such as transmission flats, transmission spheres, aperture converters, corner cube beam blocks, or pellicles. Transmission flats and spheres provide the reference surface for testing flat and spherical surfaces. The transmission sphere converts the planar wavefront from the interferometer to a spherical wavefront. For testing spherical surfaces, says Pearson, the goal is to match, as closely as possible, the f-number of the transmission sphere to the R-number (the radius of curvature divided by clear aperture) of the test surface. For concave surfaces, that's a simple exercise. For convex surfaces, it's not as straightforward.
Another accessory might be an attenuating pellicle or special coating applied to the reference surface, adds Pearson. These may be required if the surface being has a reflectivity of more than 40% to 50%.
Finally, one should consider the cost of the instrument, says Kulawiec, which not only includes the initial purchase price of the instrument, but the total cost of ownership. "While some instruments may have a lower initial purchase price, the total cost of ownership may be higher if you need to buy dedicated tooling or fixtures for every different type of surface to be measured. Also, you want to make sure your interferometer will suit your future measurement needs as your business evolves. Otherwise, you may end up with a very large and unexpected cost of an additional instrument down the road."
REFERENCES
- C. Evans et al., Proc. ASPE 2009 (Monterey, CA).
Editor's note: The "Product Focus" series is intended to provide a broad overview of the product types discussed. Laser Focus World does not endorse or recommend any of the products mentioned in this article.
About the Author
Valerie Coffey-Rosich
Contributing Editor
Valerie Coffey-Rosich is a freelance science and technology writer and editor and a contributing editor for Laser Focus World; she previously served as an Associate Technical Editor (2000-2003) and a Senior Technical Editor (2007-2008) for Laser Focus World.
Valerie holds a BS in physics from the University of Nevada, Reno, and an MA in astronomy from Boston University. She specializes in editing and writing about optics, photonics, astronomy, and physics in academic, reference, and business-to-business publications. In addition to Laser Focus World, her work has appeared online and in print for clients such as the American Institute of Physics, American Heritage Dictionary, BioPhotonics, Encyclopedia Britannica, EuroPhotonics, the Optical Society of America, Photonics Focus, Photonics Spectra, Sky & Telescope, and many others. She is based in Palm Springs, California.


