Photonic Frontiers: Optical Test and Measurement: Looking Back/Looking Forward: A revolution in optical measurement - faster, easier, and far more digital
The first laser pulse-measurement system was an oscilloscope. Theodore Maiman hooked it up to a detector and carefully monitored the oscilloscope trace when he triggered the flashlamp. His measurement of the rapid rise and fall of the pulse helped make his case for laser emission. Special Polaroid cameras were built to permanently record oscilloscope traces for further analysis and publication.
Oscilloscopes were not made specifically for optics. They had been developed to measure electronic waveforms, and had become standard tools for engineers, physicists, and others to measure time-varying properties. I was fascinated by the processes they revealed in my undergraduate electronics laboratory.
Oscilloscopes and interferometers
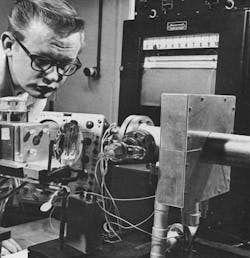
The first photograph in the initial issue of Laser Focus dated January 1, 1965 appropriately showed a laser. The second photo showed a Honeywell technician measuring the heating effects of light from a ruby laser using an oscilloscope and a strip-chart recorder, another standard measurement tool at the time (see Fig. 1). The next story told how developers at the Swedish Research Institute of National Defense used a storage oscilloscope to see how well ruby laser pulses could measure cloud heights from 50 m to 5 km.
Interferometric measurements made their debut in the February 1, 1965 issue. The National Bureau of Standards used laser interferometry to measure the length of a meter bar for the first time. K. D. Mielenz and colleagues reported accuracy of 7 parts per 100 million, using an automatic fringe-counting system and a single-mode helium-neon laser emitting on the 632.8 nm red line, and comparing it with a mercury-198 line. Our April 1, 1965 issue noted demonstrations of a gas-laser seismometer and a laser gyroscope.Test equipment proliferates
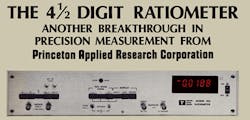
A decade later, our January 1975 issue included a growing variety of optical measurement equipment. Coherent Radiation (Palo Alto, CA) advertised a family of analog power meters with full-scale readings of 100 nW to 1 kW, at wavelengths from 0.3 to 30 μm. The product section described an analog radiometer-photometer from Alphametrics Ltd. (Winnipeg, Manitoba) with a seven-decade range and radiometric sensitivity to 10-12 W/cm2. A Princeton Applied Research ad introduced a 4 1/2 digit ratiometer, with numerical readout on red nixie tubes (see Fig. 2).The usual precision timescale of the time was nanoseconds. Cordin (Salt Lake City, UT) advertised a time-delay generator that promised nanosecond timing and synchronization for pulsed measurements. The product column described a time-interval meter from United Systems Corp. (Dayton, OH), which claimed single-shot resolution to 100 ps. But the price was $5500, about 25% higher than the average price of a new 1975 car.
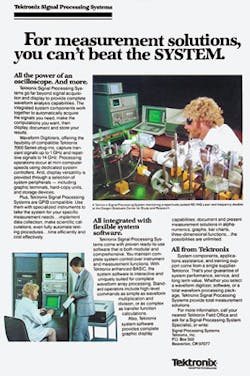
By 1980, digital equipment was going beyond nixie tubes. In our January 1980 issue, Tektronix (Beaverton, OR) advertised a "Signal Processing System" (see Fig. 3) that offered "all the power of an oscilloscope. And more." The new system went beyond acquiring and displaying signals to digitally analyze signals and document and store the results. The system included graphic terminals, printers, data storage devices, and the programming language Basic. It even could interface with microcomputers using the General Purpose Interface Bus (GPIB).
It was not alone. The products section described a monochromator/photometer from Bentham Instruments (Reading, Berkshire, England) that could be controlled directly by a microcomputer using commands written in Basic and an IEEE 488 interface, a type of GPIB connection.
Challenges in testing fiber
Many fiber-optic measurements were similar to those for other communications measurements, but multimode transmission was proving tricky, wrote Gordon Day and D. L. Franzen of the National Bureau of Standards (Boulder, CO) in a feature in our February 1981 issue. It was hard to predict link performance from measurements of individual components."Measurements on singlemode fibers are in some respects simpler and in others harder," they wrote. Attenuation was simpler because launch conditions were not critical, but bandwidth was tricky because multiwavelength sources were needed to measure material and waveguide dispersion. Few realized at the time that singlemode fiber would soon replace multimode for transmission beyond a few kilometers.
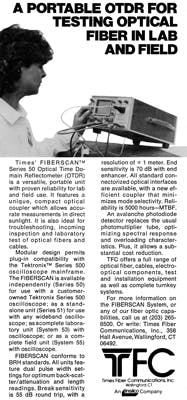
Fiber installations also required field measurements. A full-page ad from Times Fiber Communications in the February 1981 issue (see Fig. 4) described a new portable optical time-domain reflectometer (OTDR) that featured "a unique, compact optical coupler which allows accurate measurements in direct sunlight." OTDRs were on their way to become a standard for fiber troubleshooting.
Computer-control and optical metrology
"Computer-controlled measurement systems can now accomplish measurements in a few minutes which just a few years ago involved hours of tedious manual data recording and reduction," wrote William E. Schneider, president of the Council on Optical Radiation Measurements, in an October 1984 review of measurement trends.
By the end of the decade, digital connections were standard. An ad from Stanford Research Systems (Sunnyvale, CA) in our February 1990 issue described lock-in amplifiers, photon counters, and boxcar integrators that all came with RS232 links to personal computers. Screen dumps to dot-matrix printers and displays on color and monochrome computer screens took the place of Polaroid snapshots. Instruments even became add-ons to personal computers, like a board-level lock-in amplifier with 10 μV sensitivity that Ithaco (Ithaca, NY) advertised.
Meanwhile, optical metrology became a thriving business. In the February 1990 issue, Wyko Corporation advertised a phase measuring adapter, a noncontact surface profiler, two digital interferometers, a laser wavefront measurement system, and an infrared interferometer. Zygo (Middlefield, CT) advertised interferometers for testing optical components. And reflecting the growth of fiber-optic testing, York Technology (Chandlers Ford, Hampshire, England) advertised tests of fiber properties including mode field diameter and chromatic dispersion.
Optical instrumentation also pressed the cutting edge of laboratory research. A Newsbreak in our August 1995 issue reported that Eric Cornell and Carl Wieman of JILA (Boulder, CO) had used lasers to observe the first Bose-Einstein condensate containing about 2000 rubidium atoms cooled to 170 nK. It was the first observation of a whole new state of matter, and the two would share the 2001 Nobel Prize in physics for that achievement with Wolfgang Ketterle of MIT.Fiber-optic measurement and big optics
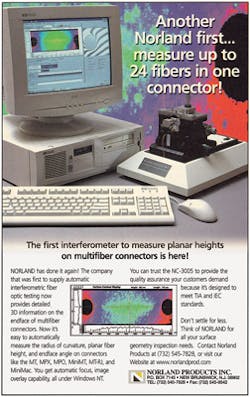
With the fiber-optic bubble coming to its peak, many instruments advertised in our May 2000 issue were designed for fiber measurements. Norland Products (New Brunswick, NJ) offered an interferometer designed to measure the radius of curvature, height, and endface of up to 24 fibers in one connector. Running under Windows NT, it offered automatic focus and image overlay (see Fig. 5). Also, Filmetrics (San Diego, CA) offered reflectometry systems designed to measure thin-film thickness, uniformity, and optical properties; RIFOCS offered test stations to simultaneously measure fiber insertion and return loss; and Agilent, freshly spun off from Hewlett-Packard, offered a "next-generation oscilloscope" with 50 GHz bandwidth capable of handling data rates above 10 Gbits/s.
Development of big telescopes brought other challenges for optical measurement. In a supplement to our October 2005 issue on optical test and measurement, Michael North-Morris of 4D Technology (Tucson, AZ) addressed the challenge of measuring both step discontinuities of segmented mirrors and the surface quality of individual segments. He recommended multiwavelength interferometry, which he said could solve the problem for the 6.5 m James Webb Space Telescope.
The growing importance of the modulation transfer function was reflected in a feature by Ben Wells of Wells Research and Development (Lincoln, MA). He explained how the MTF can provide the detailed information needed to evaluate quality of an imaging system.
As new technology emerged, new measurement techniques evolved to solve them. Our September 2010 issue told how interferometry could profile the surface quality of sapphire substrates used for high-brightness LEDs used for backlighting displays. Interferometry could recognize the patterns needed on the surface for optimum performance of gallium-nitride emitters. Using it during manufacturing could "provide long-term three-sigma standard deviations on critical parameters of height, pitch and width," wrote Dong Chen, Erik Novak, and Nelson Blewett of Veeco Instruments (Tucson, AZ).Growing specialization and computerization
Instruments continue growing more specialized and computerized. In our August 2010 issue, ILX Lightwave advertised a system to test lifetime and burnout of high-power single-emitter diode lasers. Each of up to eight temperature-controlled shelves could support up to 512 devices at 25–85°C. J. A. Woollam Co. (Lincoln, NE) advertised an ellipsometry system to measure thickness, uniformity, and optical constants of thin films over large areas.
These trends continue in the latest products on our website and in our pages. A fiber-optic spectrometer from Avantes (Broomfield, CO) stores up to 50,000 spectra and comes with Gigabit Ethernet and USB connections. That's a long way from the RS232 ports on early instruments, a protocol introduced in 1962 that—even in enhanced versions—could carry no more than 20,000 bits/s.
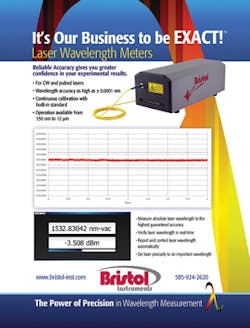
An ad on the inside cover of our August 2015 issue points to another trend-increasing precision (see Fig. 6). Bristol Instruments (Victor, NY) claims wavelength accuracy to ± 0.0001 nm for its wavelength meters, spanning the range from 350 nm to 12 μm. The ad plots a slightly wiggly line just about that width at 1532.8304 nm in vacuum. That's impressive.
In the good-old days, optical sensors used to be sensitive, and we had to worry about frying them with high-power laser beams. But now Ophir Photonics (North Logan, UT) offers fan-cooled laser sensors to measure laser power to 1100 W and energies to 600 J.
But some old techniques are still around. Flip through the 2015 Laser Focus World Buyers Guide and you'll find two companies listing oscilloscopes. The venerable Tektronix website has scopes ranging from a $520 basic model to its top-of-the-line "Advanced Signal Analysis" model listed at $479,000. Or if nostalgia is your thing, check out eBay's large assortment of "vintage oscilloscopes."Looking forward
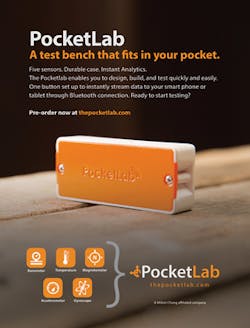
You can see bits of the future of test and measurement if you look around you. In our August 2015 issue is an ad for an intriguing new "test bench that fits in your pocket" from PocketLab (see Fig. 7). Intended for research and education, it contains a barometer, thermometer, magnetometer, accelerometer, and gyroscope, with a Bluetooth connection to a smartphone or tablet computer. Thanks to mass-produced microelectronics and microsensors, it's making powerful measurement tools broadly available.
It's part of the smartphone wave of powerful technology, and it's still figuring out where it's going. Today's smartphone has the power of a circa-1990 supercomputer packed into a small glass slab. It may make a mediocre telephone, but it brings an amazing computing capability to your pocket. Combine the mass-produced hardware with customized software, and it's a powerful tool for measurement and analysis.
But that's only one part of the big picture. The latest and greatest optical clocks at JILA can keep time accuracy to 1 s over 15 billion years—longer than the life of the universe. Optical frequency combs measure frequencies with extreme precision. Meanwhile, technology keeps pressing for more optical testing capabilities, from precise measurement of power generated from high-power lasers to precise measurement of subwavelength dimensions for nanotechnology.

Jeff Hecht | Contributing Editor
Jeff Hecht is a regular contributing editor to Laser Focus World and has been covering the laser industry for 35 years. A prolific book author, Jeff's published works include “Understanding Fiber Optics,” “Understanding Lasers,” “The Laser Guidebook,” and “Beam Weapons: The Next Arms Race.” He also has written books on the histories of lasers and fiber optics, including “City of Light: The Story of Fiber Optics,” and “Beam: The Race to Make the Laser.” Find out more at jeffhecht.com.
