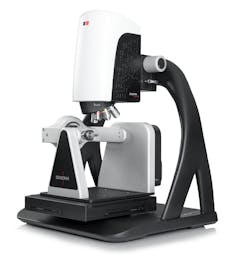
Complete and fast 3D measurement solution, new S neox Five Axis
Sensofar Metrology is proud to announce the release of a New S neox Five Axis. The new 3D optical profiler still combining the same high-accuracy rotational module, the high-resolution translation platform and advanced inspection and analysis capabilities but includes the best improvements in terms of design, functionality, performance and speed. This enables automated 3D surface measurements at defined positions (perspectives) that combine to create complete 3D volumetric measurements – ideal for micromachining, additive manufacturing, tooling and medical technology applications.
The new S neox Five Axis outperforms existing optical 3D profiling microscopes in reference to efficiency as everything is faster with smart and unique algorithms. Data acquisition is taken at 180 fps and standard measurement acquisition is 5X faster than before.
The S neox Five Axis design has been improved in terms of flexibility, stability and durability required for both R&D and QC laboratories. Our optimized solutions are able to work in QC environments due to their flexibility and easy-to-use interface and can be programmed to work 24/7. The Sensofar’s 3-in-1 technologies approach found in the S neox Five Axis sensor head – Confocal (for critical dimensions), Interferometry (for sub-nanometric roughness) & Ai Focus VariationNEW (for shape and form) – contributes critically to the versatility of the system and help to minimize undesirable compromises in the data acquisition.
The most significant features are:
New Active illumination Focus Variation is an optical technology that has been developed for measuring the shape of large rough surfaces. It has been improved with the use of active illumination to get more reliable focus location even on optically smooth surfaces.
New thin film measurement technique which allows the user to measure the thickness of optically transparent layers quickly, accurately, non-destructively and with no sample preparation. Transparent films from 50 nm to 1.5 μm can be measured in less than 1 second.
High Dynamic Range (HDR) mitigates reflection and drop-out points on highly reflective surfaces (local slopes and/or different materials).
The new S neox Five Axis also integrates several special acquisition modes designed to complement and exploit the capabilities of the motion system. Manual mode measures individual field-of-views (FOVs) with high-accuracy positioning, while Grid mode can capture individual FOVs at several different (lateral) positions. Finally, 3D mode is an automated procedure using a ‘five multiple recipes’ (5MR) that combines five-axis positions and measurement acquisition to obtain a 3D topography in the STL file format. The STL file format is supported by many 3D software analysis platforms, such as Gom, Polyworks, Kotem and Geomagic.
The new S neox Five Axis system is thus effectively a dedicated solution for comprehensive surface characterization of a sample from different perspectives and for different application needs, including full 3D acquisition.
With the acquisition controlled through Sensofar’s intuitive, user-friendly SensoFIVE, an additional advanced analysis module provides the necessary tools for determining form deviation from 3D CAD models, for highlighting test and wear deviations (e.g. for tooling), for reverse engineering applications, as well as measuring critical dimensions (angles, radius, contour), surface texture according ISO 25178 (form and roughness) and volume.
Further details can be found at S neox Five Axis page.
About Sensofar
Sensofar-Tech, SL (marketed name Sensofar Metrology) is a leading-edge technology company that has the highest quality standards within the field of surface metrology. Sensofar Metrology provides high-accuracy non-contact 3D surface metrology systems based on confocal, interferometry and focus variation techniques.
The product portfolio includes standard setups for R&D and quality inspection laboratories and compact inline non-contact metrology solutions for production processes. Sensofar Metrology offers technology that enables our customers to achieve real breakthroughs, particularly in the semiconductor, precision optics, data storage, display devices, thick and thin film and material testing technology fields.
Sensofar Group headquarters is located close to Barcelona, also known as a technology and innovation hub in Europe. The Group is represented in over 30 countries through a global network of partners and has its own offices in Asia, the United States and Germany.
