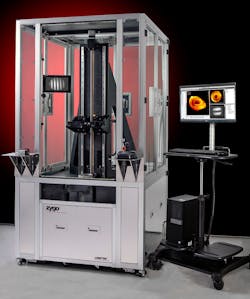
New Interferometer System Boosts Productivity for Spherical Optics Manufacturers
An issue that many optical shops have in common is that opticians need to make trips back and forth from the polishing machines to the interferometer system to check the surface form or radius of curvature of the spherical optics they are fabricating. Not only does the transit time reduce the efficiency of the operation, but the chances of damaging an optic are proportional to the distance it has to travel to and from the interferometer setup.
Also, if radius of curvature measurements are required, setup time needs to be factored in, as do potential inaccuracies in locating the cats-eye and confocal positions, due to operator subjectivity.
The Production Solution
Thankfully, these production inefficiencies can now be relegated to the past, thanks to the introduction of ZYGO's Verifire™ VTS (Vertical Test Station) interferometer system.
This upward-looking interferometer workstation provides stable and robust metrology of spherical optic surface form error and radius of curvature measurements – right on the shop floor.
The industrial enclosure provides protection from the elements, yet still allows easy access to the interferometer. The motorized Z-axis stage – with a full 1 meter of travel – simplifies part positioning and enables reliable automated radius of curvature measurements.
The motorized stage, in combination with Mx™ measurement and control software, helps improve production efficiency, and removes much of the subjectivity in radius of curvature measurements. As a bonus, the system's compact footprint consumes minimal floor space, making it easy to integrate into virtually any production area.
The system can be configured with most current ZYGO interferometer products.
