X-ray diffraction tool to speed laser peening application development

LSP Technologies (LSPT; Dublin, OH) has enhanced its in-house measurement of compressive residual stress in metals, installing a new X-ray Diffraction (XRD) instrument. XRD measurements will help the company to develop laser peening (a process that induces deep levels of compressive residual stress in metal to prevent fatigue, corrosion, cracking, flaking, and other cases of metal failure) prescriptions for customer needs more quickly and accurately for complicated geometries and parts.
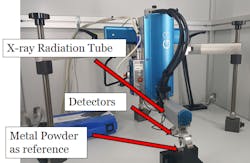
The Xstress G3 device from Stresstech (Vaajakoski, Finland) can access small spaces and complex geometries, including many of the industrial shapes and components typically treated by LSPT's laser peening processes.
In most cases, XRD exceeds the precision of slitting tests, formerly used by the materials lab, in measuring compressive residual stress, which is measured in mega-Pascals (MPa or Ksi). In slitting tests, a wire slitter slices through the surface of metal parts, and electronic strain gauges provide data that matches a residual stress profile. Due to the strain gauges being mounted on the back of the sample, slitting can’t capture near surface residual stresses with high certainty. The process used at LSPT is designed for rectangular shaped samples, but not for complex metal shapes such as blades, gear teeth, or the interior of tubes.
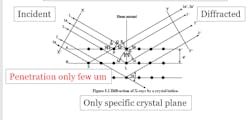
XRD involves aiming x-rays at a material. The reflecting rays "bounce," sending a unique diffracted fingerprint that reveals patterns of residual compressive stress. The process is ideal for examining metals because the wavelength of x-rays is at the same magnitude as the distance between grain layers in metals.
"XRD testing overcomes many of the problems with slitting, but I think the real advantages of in-house XRD testing is our ability to improve our cycle time on delivering results to customers," explains Micheal Kattoura, a Materials Research Engineer for LSPT.
For new alloys and shapes of components, laser peening must deliver precise levels of residual compressive stresses at precise locations. That may take some experimentation at several different levels of power density (GW/cm2), different layering of peening spots, and other variables available with LSPT's Procudo laser peening system.With the XRD addition, LSPT can test quickly and accurately, seeing the stress levels it has achieved in the critical locations within hours, not days, over a wide range of variables, and then meet customer requirements accurately and economically, Kattoura says.
Other advantages of in-house XRD testing will include:
- Consistent pinpointing of the component spots and depths at which compressive residual stress must be measured.
- Using electropolishing (removing a layer of material with an electrolyte solution [saltwater or acid solution] and electricity) to measure stress levels at progressively deeper layers of material.
- A standardized XRD measurement reporting system that will capture all the XRD parameters, material parameters, and other information related to component processing.
For more information, please lsptechnologies.com.
