High-quality welding with green and blue lasers
There are many possibilities offered by green and blue lasers, particularly in the area of welding copper. But an industrial use requires a stable process result and, therefore, continuous monitoring of the laser beam tool.
E-mobility needs powerful batteries and infrastructure in the vehicles, and that doesn’t come without the use of copper. But welding with infrared (IR) lasers can be too slow, may have high energy consumption, and cause quality problems with the weld seams. Even so, the laser is often the tool of choice for an automated production process requiring short turnaround times and high reliability, especially for the secure joining of aluminum and copper.
The concern with IR lasers is that copper absorbs only about 5% of IR radiation from the laser beam, and therefore a correspondingly high amount of laser energy is needed to start the welding process. If the weld pool exists, it absorbs more IR energy than solid copper. This excess energy in the molten weld can cause the metal to evaporate and form bubbles, which is what can cause splashes, pores, and thus reduce the quality and functionality of the component.
Light in the green and blue range is absorbed by nonferrous metals up to 20X more efficiently than IR radiation, so melting requires significantly less energy. This offers adequate industrial process windows for controlled welding of thin sheets or foils.
Green lasers with the appropriate power required for industrial applications are usually frequency-doubled IR lasers with wavelengths between 515 nm and 532 nm. Their disadvantage is that they are—compared to the IR variants—less efficient, may lose power during a manufacturing process, and require expensive cooling and complex optical setups.
Blue lasers do not have these constraints. Gallium nitride (GaN) and indium gallium nitride (InGaN) are semiconductor materials that provide the blue light by themselves, but only at a few watts per diode. However, to achieve outputs in the kilowatt range with blue lasers, the industry has developed several concepts. Here, only two are described.
In the joint research project BlauLas, Osram and Laserline developed laser bars that combine multiple lateral lasers into a single component. Such bars can then be stacked on top of each other to further increase the power of these systems.
Nuburu combined single emitters that have a longer lifetime than bars, whose lifetime is nevertheless usually long enough for industrial applications. Also, single emitters have a higher beam quality. However, current blue lasers deliver between 1.5 and 2 kW of power, with a beam quality that is lower than that of green lasers, due to their construction.
Whether stacking bars or bundling individual diodes, monitoring the beam quality is a complex matter. The reality is that familiar systems for monitoring beam quality of IR lasers cannot continue to be used without modifications for the green and blue lasers.
Reliable monitoring of welding parameters
Even an initially ideal laser beam changes on its way to the processing point in the robot hand due to the influences of deflecting mirrors, beam guides, focusing units, etc. To guarantee the reproducibility of the welding quality, parameters such as beam power, beam diameter, and focus position must always be known throughout a manufacturing process. Thus, a regular check of these parameters significantly reduces the production costs and saves time compared to the destructive tests of the welding seams.
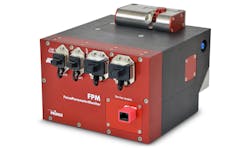
Some companies have worked to fill this need. PRIMES GmbH (Pfungstadt, Germany), with its FocusParameterMonitor (FPM) tool, is able to simultaneously determine power, beam position, beam dimension, and distribution over a wide power density range from 1 kW/cm2 to 50 MW/cm2. With available field bus interfaces, such a measuring device can be integrated into production networks and simplify the transfer of measurement data.
An alternative approach is to use mechanical scanning systems. Due to different internal detectors, they can be used in many environments and allow measurement of near-IR, green, and blue laser beams.
Beam monitoring can also be performed with systems that use Rayleigh scattering. However, it is not possible to determine the beam distribution. Furthermore, it is limited to very high power densities and a wavelength range from 980 to 1080 nm, with a minimum power density of 2 MW/cm2. Therefore, a number of processes cannot be monitored.
With the availability of green and blue lasers with sufficient power for industrial use, the optomechanical design of the measuring devices were revised and the internal optics adjusted to the wavelength.Robust, compact measuring system
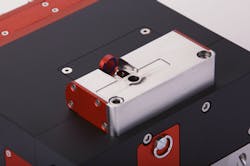
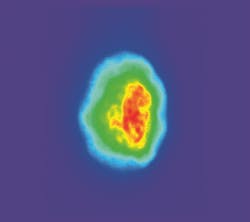
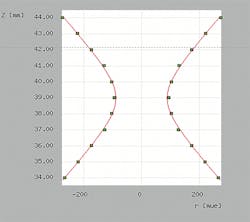
At the beam input of a reliable measuring device, an electrical shutter (see Figs. 1 and 2) and a protective glass are useful to protect the instrument from contamination. The laser beam enters the device via a deflecting mirror and is split into a beam for measuring the laser beam power and a separate beam for determining the beam profile and geometric dimensions.During monitoring of the laser beam, it should be noted that the laser beam is usually not round and thus its dimensions in the x and y directions have to be taken into account. To integrate the system into a production line, a measuring time of about five seconds is useful to make sure the full beam is captured. A standard-compliant measurement of the beam position and beam propagation requires the recording of the power density distribution at different positions in the propagation direction. A reliable link of the robot axis to the measuring device is essential for this to be effective.
Companies like compact measuring systems for condition monitoring that can be implemented with a plug-and-play installation. It is also important that the system be integrated directly into the process control system via the appropriate field bus interface, and can transfer complete data sets within a very short time.
In the traditional wavelength ranges, the systems for beam diagnostics have proven themselves—now, they must be made fit for green lasers and for blue lasers as well.
About the Author
Barbara Stumpp
Freelance Science Writer
Barbara Stumpp is a freelance science writer based in Germany.


