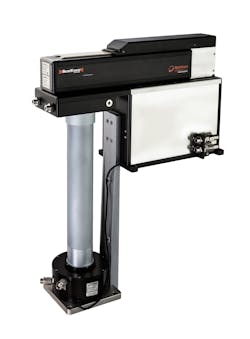
Measuring critical laser parameters in real-time for production environments

Ophir (a MKS Instruments brand; Logan, UT), which provides technologies that enable advanced processes and improve productivity, has introduced the BeamWatch Integrated 500 industrial beam characterization system, a fully automated, noncontact laser measurement system designed for automotive and battery welding applications. The system works with single-mode lasers using long focal lengths up to 500 mm from focal point to power meter. It integrates both beam profiling and power measurements into a compact, rugged, self-contained device that measures critical laser parameters in real-time, including focal shift, focus spot size, beam caustic, and absolute power. It can accommodate different types of welding heads as well as a variety of industrial interfaces (PROFINET, Ethernet/IP, and CC-Link) for integration into production networks and automated manufacturing lines to facilitate direct transfer of measurement data.
“The lasers employed for cutting and welding equipment on production lines are becoming more powerful, but due to time constraints and/or complexity, the quality of the laser beam often goes unchecked,” said Reuven Silverman, General Manager of Ophir Photonics. “As laser process quality is directly related to laser quality, this can lead to large batches of defective parts in high-throughput production lines.”
The BeamWatch Integrated 500 industrial beam characterization system monitors high-power YAG, fiber, and diode lasers in the 980–1080 nm range. It charts all beam measurements over time in industrial material processing applications, such as welding and cutting operations in automotive, heavy equipment, and appliance manufacturing. Fast measurement times allow the laser beam to be checked automatically during the loading/unloading phase, as frequently as once every unit produced. All parameters are displayed and stored. Trend diagrams based on this data deliver useful insights for predictive maintenance, and tolerances and limit values can be set to trigger corrective actions and go/no go decisions. For example, as protective glass becomes dirtier, there is an increase in focus shift; this reduces the power density at the workpiece, resulting in defective welds. The trending function can monitor focus evolution and trigger an alarm should the focal point move beyond the defined limit. The protective glass can then be cleaned or replaced before producing bad parts. This maximizes quality, improves throughput, reduces waste, and lowers costs.