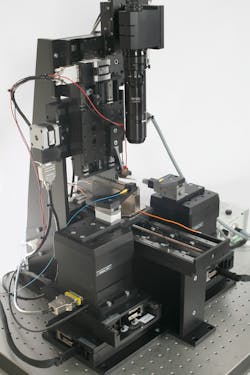
Nanosystec optical alignment system offers full automation
NanoTest performs optical alignment on the input and/or output side, with up to six axes of active alignment on each side, and features contacting, machine vision, and temperature-controlled jigs to hold devices. A lens assembly with singlemode fiber carries laser-diode light to the modulator and to the measurement instruments. The entire test can run fully automated for a series of bars or chip-on-submount devices.
Nanosystec GmbH
Gross-Umstadt, Germany
[email protected]
-----
PRESS RELEASE
High Volume Characterization of Optical Modulators
Optical modulators (Mach Zehnder or LiNBO3) are widely used in fiber communication – either inside the housing together with the diode laser or as separate units in the optical chain. Thorough testing of these deviceson bar or Chip-on-Submount level is required before final packaging.
For the tests of extinction ratio, eye diagram and many more, a series of standard instrumentation from various suppliers is available. Nanosystec now delivers NanoTest: a standard set-up for the optical alignment on the input and/or output side (up to 6 axes of active alignment on each side), contacting, machine vision and temperature controlled jigs to hold the devices.
The temperature of the customized holder can be varied over a large range (either with recirculating liquid or thermoelectric elements). The uniform temperature distribution guarantees excellent position stability during test.
A lens assembly with single mode fiber carries the light of the laser diode to the modulator and on the outcoupling side to the measurement instruments. For optimum coupling efficiency, the light coupled into the optical fiber is measured and serves as feedback signal for axis position. The position drift over the measurement period of approximately 15 minutes is negligible. The obtained measurement results are usable without any limitation and time consuming realignments are not required.
The optional machine vision system supports fast pre-alignment. The entire test can run fully automated for a series of bars or Chip-on-Submount devices. Upon request, software integration of test instruments and data handling can be offered as well.
Nanosystec GmbH
Marie-Curie-Strasse 6
64823 Gross-Umstadt
Website: www.nanosystec.net
E-mail: [email protected]
Phone: +49 (6078) 782540
-----
Subscribe now to Laser Focus World magazine; it's free!
